Cloud migrations can be painful. Part of the pain with migrating to Office 365 is getting ALL of the company email into the cloud. Active users are typically easy as there are endless methods for migrating active users. But what about companies that have archived and\or offline email? Trying to manage them locally on PCs is cumbersome and risky. Opening them over the local networks is slow and unstable. We need a method to upload PSTs into shared mailboxes where we can easily attach them to other mailboxes using Office 365 memberships. This blog post is how you should upload PST files into Office 365 mailboxes.
Recommendations, Requirements, and Support
First step is to have your PST files ready for the import process. How you get to that point is up to you but there are some guidelines you should follow. First, PST files are notoriously unstable at around 8GB and larger. The larger they go beyond 8GB the worse they will be. How to carve up a mailbox into multiple PSTs is the subject of another blog post, sorry. Second, PST files are really easy to break into if security is an issue. Even if they are password protected, they are easy to crack. Make sure you store these file on an encrypted volume for long term storage if the need is for secure archived email. Third, it is recommended that you use UNICODE PST file. ANSI is also supported. Additionally, the PST must be exported from Exchange 2010 SP1+ or exported from Outlook 2007+. PST exported from Outlook 2003 and older will not be supported.
Last, to perform this exercise we will need to be a Global Admin in the Office 365 organization. You will also need to modify the permission of one of the Exchange Roles to have Import and Export rights. By Default this is not a part of any “Built in” Exchange role. Here is how you add that to the Organization Role, which applies to all Exchange Admins.
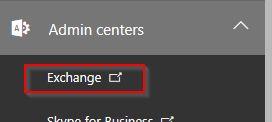
Open the Exchange Management Portal from the Office 365 “Admin Centers” Section in the bottom left of the Admin Portal.
Select the Permissions menu item on the left hand portion of the screen.

Select admin roles and select Organization Management. Then click the Pencil icon to Edit it.

Click the plus icon under Roles:.

Scroll down to find “Mailbox Import Export”, select it, click add ->, and then OK.
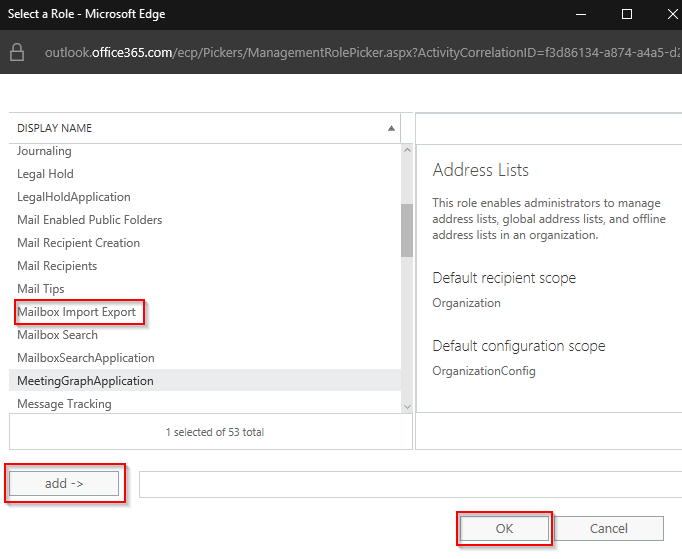
Confirm that “Mailbox Import Export” is listed in the roles and click Save.

The Global Admin account is now ready to perform the PST import.
Let’s do this
Once you have everything in place the first place to start is to log into your Office 365 Organization as the Global Admin and enter the Admin center.
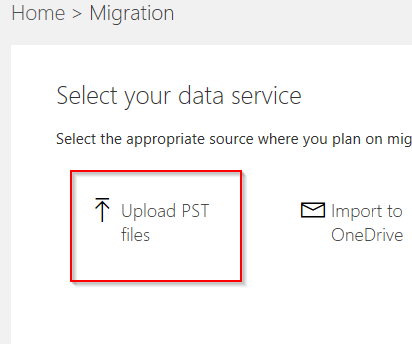
In the Admin center select Users->”Data Migration”.

Next we will select the Upload PST files button.
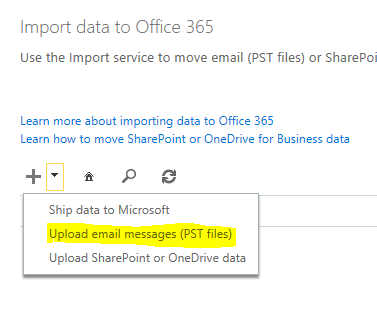
Click the arrow down menu and select “Upload email messages (PST files).
Data Upload
Click the link to Show network upload SAS URL and copy it to a text file.

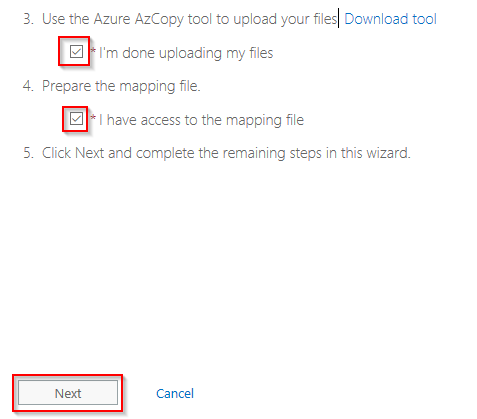
The click the link to download the AzCopy tool and install it with all the default settings.

Once that is installed, we need to share the location of the PST files. Any network share will do. You can even share out your own local folder and reference that in your upload command.
Once that shared, open an Administrator:command prompt or with the path of %ProgramFiles(x86%)\Microsoft SDKs\azure\azcopy.
Then type your upload command using this format:
AzCopy.exe /Source:\\Server\Share /Dest:"SAS URL you copied to a text file"
*Warning* Make sure you include the Https:// and the “” around the whole SAS URL. It will fail if you don’t.
If you were successful you will see something like this.

CSV File
Next we need to download a copy of the “pstimportmapping” CSV file and edit it. Edit it to to this format:
Workload,FilePath,Name,Mailbox,IsArchive,TargetRootFolder,ContentCodePage,SPFileContainer,SPManifestContainer,SPSiteUrl
Workload is always Exchange
FilePath is always left blank unless you specified a path in the SAS URL upload
Name is the PST file name
*Warning* Your pst file names are case sensitive. Make sure they match the casing in the pst names that were uploaded into the Azure Copy.
Mailbox is the users Office 365 username or Primary SMTP address
IsArchive is for whether or not to add to the live mailbox or the archive mailbox for the user. Only enter TRUE or FALSE. TRUE = Archive mailbox. FALSE = Live mailbox.
TargetRootFolder is the path to import into the mailbox. If left blank Exchange will add a folder in the mailbox called “Imported”. Enter / and Exchange will add the mail contents to the inbox. Enter /folder and it will dump the mail contents into a folder called folder in the root of the users mailbox.
The rest of the content should be left blank.
Once that is done, select the two check boxes “I’m done uploading my files” and “I have access to the mapping file.
Starting the import
Now we are at the final stretch run. Name the import job. All lowercase and no spaces(weird).

Next we will upload the pstmapping CSV file and validate it.

If you formatted the CSV file correctly the import job will start.
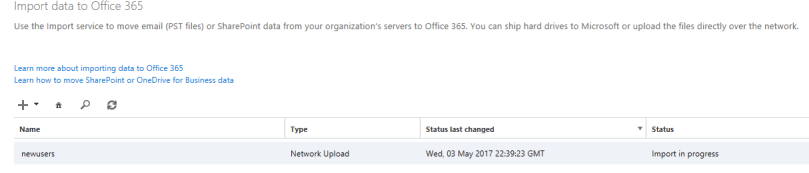
You can monitor the progress of the job by clicking the Details link on the right hand side of this view. You can leave this and come back to monitor the progress. The worst part about this is that there isn’t much to do at this point other than hope the it works. If it fails you can open a service request to get more details.
Happy Importing!
